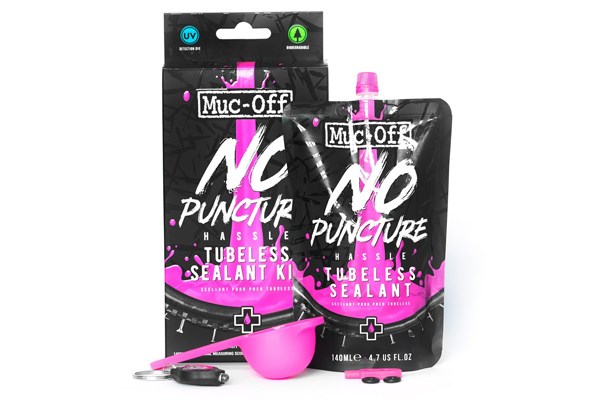
Peatys Tubeless Sealant Workshop Bottle

Peaty's tubeless sealant is an ammonia-free, non-hazardous, latex-based tubeless tyre compound. Our sealant lasts up to 6 months in the tyre in temperate climates*, won't ball up in the tyre and is easily washed out with water.
Our lightweight formula seals quickly and effectively, while our biodegradable glitter platelets take care of holes and tears up to 6mm. added corrosion inhibitors prevent degradation of tyres and rims.
WAIT, IS THAT PLASTIC GLITTER?! - Hell no! No micro-plastics or microfibres here... The platelets in our sealant are BioGlitter made from a special form of cellulose from hardwoods, primarily eucalyptus sourced from responsibly managed and certified plantations operating to PEFC www.pefc.org standards. They work like platelets in your blood, building up behind holes to help our fast acting sealant form an even stronger bond with the rubber in your tyre.
Key Features:
- C02 compatible.
- Seals up to 6mm holes.
- Operating pressures: 15 to 120 psi.
- Operating temperature: -20°c to +50°c.
- Seals porous tyres and bead/rim gaps.
Recommended Quantities*:
- Road 30 - 45ml.
- Cyclocross 60 - 75ml.
- 26" MTB 60 - 80ml.
- 27.5" MTB 70 - 90ml.
- 29" MTB 100 - 120ml.
*Quantities quoted per tyre. For wider rim / tyre combinations and / or additional puncture protection we recommend adding up to 30ml more sealant to the above quantities.
Setup Instructions:
- Shake the packaging vigorously before every use to ensure an even distribution of platelets.
- Rinse away any dirt, oil and other sealants from the tyre and dry off completely. See the below FAQ section for more detailed information on this.
- Seat both sides of your tyre onto the rim and inflate initially with no sealant, using a track pump, inflator or compressor to pop the tyre bead fully onto the rim. If using a track pump, a good tip is to remove the valve core before inflating as doing so allows a greater volume of air into the tyre and so helping it to seat more easily.
- Deflate the tyre fully, taking care to keep the tyre bead fully seated on the rim.
- Remove the valve core from the valve and Put it in a safe place (you'll need to put it back in shortly!)
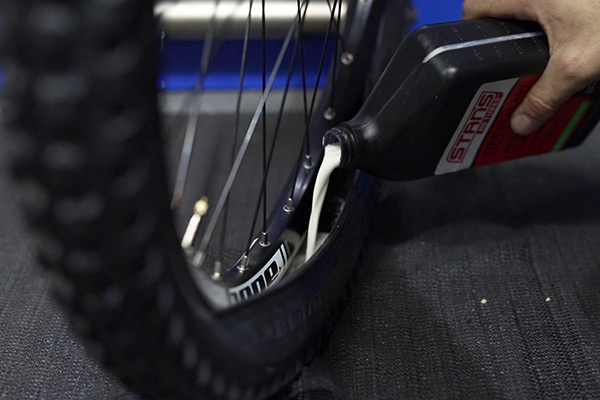
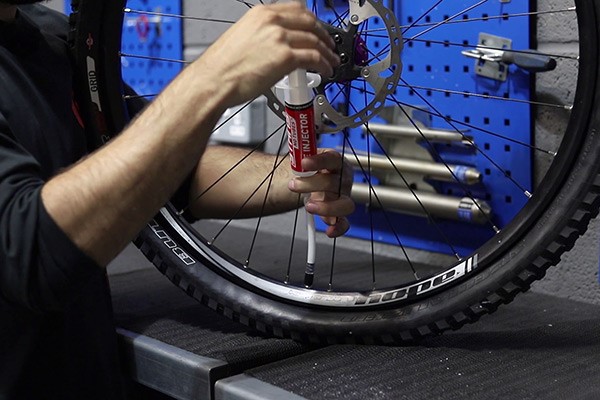
- With the valve at the three o'clock position, Push the pouch directly onto the valve (120ml Trail Pouch) or use the flexible injector pipe provided (500ml or 1L Workshop Bottle) to inject the desired amount of sealant directly through the de-cored valve.
- Re-insert the valve core and re-inflate the tyre to desired pressure.
- Wash away any excess sealant that may have found its way to the outside of the tyre or rim with water.
- GO RIDE! This will disperse the sealant around the inside of your tyre and rim sealing any small gaps.
Peaty's Top Sealing Tips:
Make sure you thoroughly clean the inside of your tyres of any dirt, oil and other sealants before you first setup tubeless. New tyres are often coated on the inside with a residual chemicals from the manufacturing process (specifically release agents) which can react with tubeless sealant and cause it to solidify prematurely.
Let the tyre dry fully after cleaning and wipe the tyre with Isopropyl Alcohol or our Disc Brake Cleaner before applying sealant.
Tubeless tyres rely on a thin lining of butyl rubber on the inside of the tyre to hold air (and sealant). Some new tyres (especially very thin / lightweight tyres) can have tiny imperfections in this lining making the tyre slightly porous so it is normal for new tyres to deflate slightly after the first installation.
Porous tyres may also absorb some sealant within the first few riding hours to help seal these tiny holes. In severe cases you may even see this small dots of white fluid coming out of the sidewall of your tyre. This is fairly normal and should seal within 24hrs but if your tyre continually leaks out of the sidewalls then contact your tyre manufacturer as there may be a larger fault with the tyres construction.
It is best to check your sealant levels after two weeks of application and top-up any lost fluid if required.
Occasionally, without notice, manufacturers change product design and/or specifications.
Tubeless Sealant and Accessories Guide
Riding with tubeless tyres means that you’ll spend less time fixing flats and more time shredding the trails or lighting up the open road. In this tubeless guide we’ll look at all the things you need to get your wheels and tyres rolling without inner tubes.
Tubeless Sealant
Sealing all the little air gaps in your tyres, whether through a puncture or a less-than-perfect tyre/rim seal, tubeless sealant is an essential for every cyclist who wants to ride without tubes. There are a few different options to choose from, but they all work on the same principle: a liquid that solidifies when it leaks out of the tyre to seal gaps and punctures.
While simple latex-based liquids will work as sealants most brands sealants use special formulas and additives to improve longevity and sealing performance. Sealants with particles added are better at sealing larger holes so are ideally suited to mountain bike tyres. Lighter weight sealants are good for road bikes as puncture holes are generally smaller and easier to heal. Some sealants don’t work well with CO2, so check for compatibility if you plan on using a CO2 inflator to seat your tyre.
How much sealant should I use?
The amount of sealant you need to use will depend on the volume of the tyre. Brands will recommend specific amounts for their sealants which will be about 30 – 60ml for road bike tyres and 70 – 150ml for MTB tyres.
The table opposite shows typical sealant quantity recommendations to use as a starting point. If your tyres are a little porous some sealant may leak out. Don’t worry about this, it’s just the sealant doing its job, but you may need to top up with a little extra to be sure that there is enough left to seal any punctures.
|
Tyre size |
Sealant quantity |
|
27.5 x 2.0 |
75ml |
|
27.5 x 2.4 |
110ml |
|
29 x 2.0 |
90ml |
|
29 x 2.4 |
130ml |
|
700 x 25 |
30ml |
|
700 x 32 |
50ml |
Tubeless Sealant Accessories
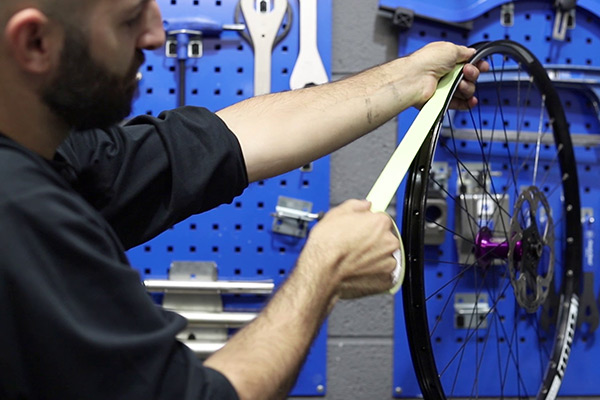
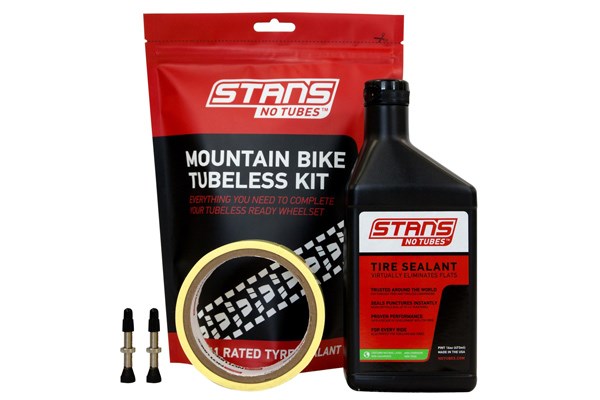
Tubeless Rim Tape
If your wheel doesn’t have tubeless ready rim tape installed, then you will need to tape the rim with tubeless compatible tape. Tape is available in different widths and you’ll need a size that best matches the internal width of your rim.
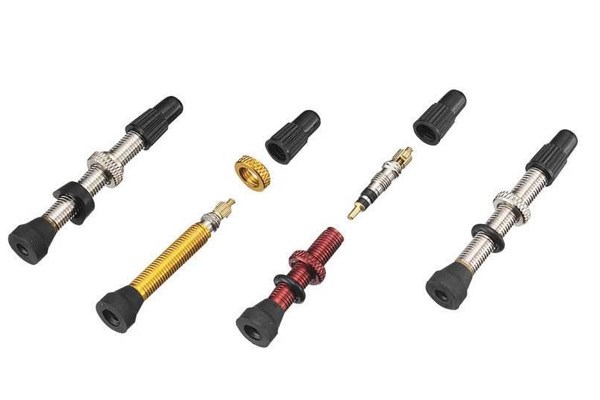
Tubeless Valves
As there is no inner tube the valve attaches directly to the rim of a tubeless wheel. These are usually Presta valves. Make sure that you get ones that are long enough to easily go through the rim of your bike. Longer valves are available for deep section rims. The valve cores tend to block up with sealant after a while so they will need taking out and cleaning and/or replacing from time to time.
Tubeless Conversion Kits
Tubeless conversion kits contain sealant, tape and valves as well as fitting instructions, so these are the best option when converting your wheels for the first time. When buying a conversion kit make sure that you get one with the correct tape width and valve length to fit your wheel.
Sealant Injector
You can pour sealant into the tyre before you finish putting the tyre on, but many people prefer to inject the sealant through the valve. You can use a normal syringe, but specific injectors usually include a valve adaptor that makes the job easier. Some Tubeless Kits include an injector.
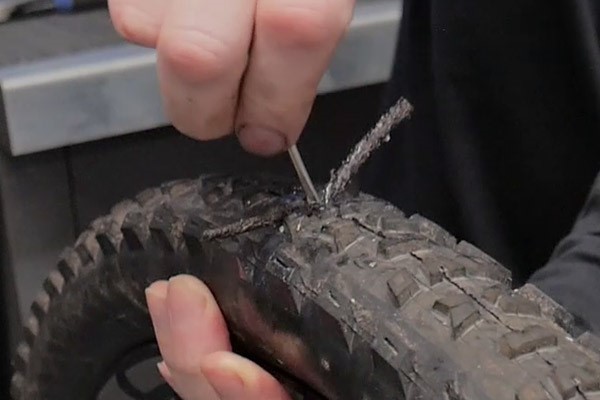
Tubeless Tyre Repair Kits
While sealant will heal smaller punctures by itself a larger hole or tear in the tyre will need to be plugged or patched. Tubeless plug systems offer long lasting repairs and are very quick and easy to use even at the road or trail side. If you don’t want to have a small bit of the rubber bung showing through your tyre, then you will need to take the tyre off and patch it from the inside.
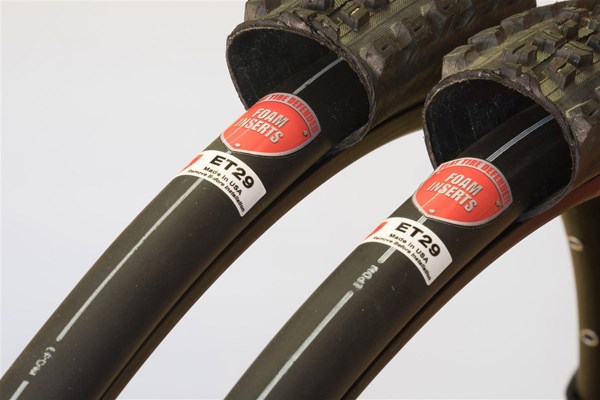
Tyre Inserts
Foam tyre inserts cushion the blows from rock strikes, especially when running low tyre pressures. They are a great way to protect your MTB tyre and rim when riding through rough terrain. Inserts can also help to keep the tyre on the rim more securely to avoid burping air when cornering.
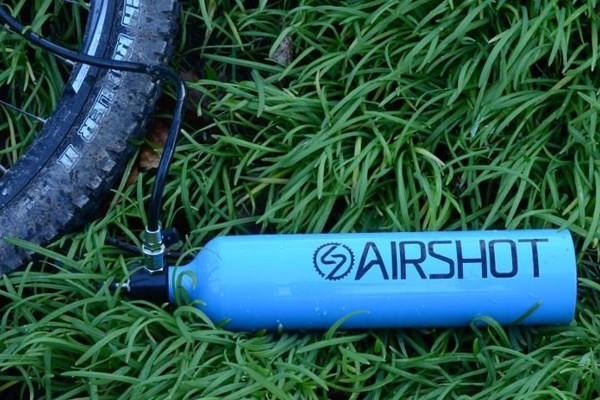
Tubeless Inflators
When you fit a new tubeless tyre, it can sometimes be difficult to get the tyre seated properly on the rim. This is because a normal track pump doesn’t blow the air out quick enough to overcome the initial gaps between tyre and rim. Tubeless inflators allow you to blast a shot of air directly into the tyre to pop it onto the rim.
Tubeless inflators like the original Air Shot need to be pumped up with a separate track pump whereas others combine both track pump and inflator tank. See our range of tubeless inflators
How to Convert to Tubeless
While tubeless systems will save you time in the long run, they do take a little more care to set up.
See our Tubeless Tyre Conversion Guide for more.
Customer reviews and Q&A's are disabled because you declined functional cookies.
To enable reviews and Q&A's click the 'Cookie Settings' button below and enable functional cookies.
No longer available
Sorry you missed the Peatys Tubeless Sealant Workshop Bottle.
This product is no longer available.