IN STOCK SRAM

WE WON'T BE BEATEN ON PRICE
SHOP NOW
How To Attach And Remove Pedals Banners How To Attach And Remove Pedals Banners

How To Attach And Remove Pedals

Easily and quickly install and remove your pedals

It is important to know the steps to properly attach pedals to your bike. The pedals have opposite threads to each other, making it only possible for them to go in one side of the bike. We will show you how to identify this, as well as how to easily fit the pedals thereafter. 

  What you will need
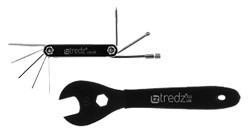
Multi-tool

15mm Pedal Spanner or 6/8mm Allen key
Tredz Pedal spanner

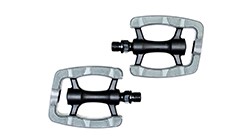
                               Pedals

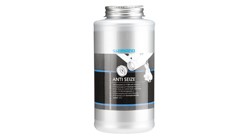
Grease

                      Grease (optional)

1
Identify Right and Left Pedals

The pedals should have an R and an L stamped in the axles indicating which side the pedals attach to (right and left sides observed as you are sitting on the bike). This will either show on the flat space where the pedal spanner fits onto, or on the end of the axles, where the Allen key fits into. It is also sometimes stamped on the pedal body. 
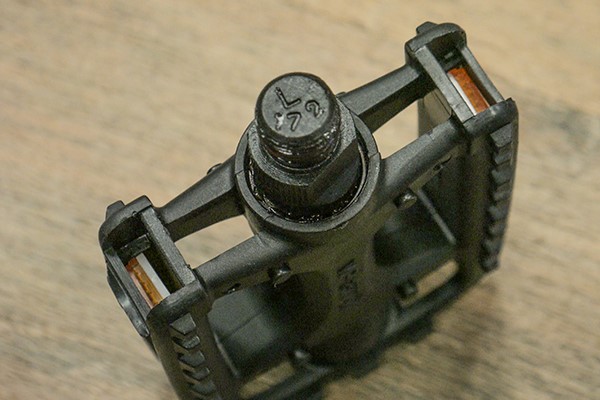
Showing the pedal base indicating that it is for the left hand side

2
Attaching the right hand pedal

The pedal body and pedal axle rotate freely from each other, so you will need to screw the pedal in by the axle. It is worth adding a touch of grease onto the threads before attaching, as it will make it easier to both attach and remove. 

It is very important to start by screwing the Right pedal BY HAND into the crank arm in a Clockwise direction, or towards the front of the bike. It should go in easily. When it gets to the end, use the spanner or Allen key to tighten it fully. Use only a small amount of force to tighten.
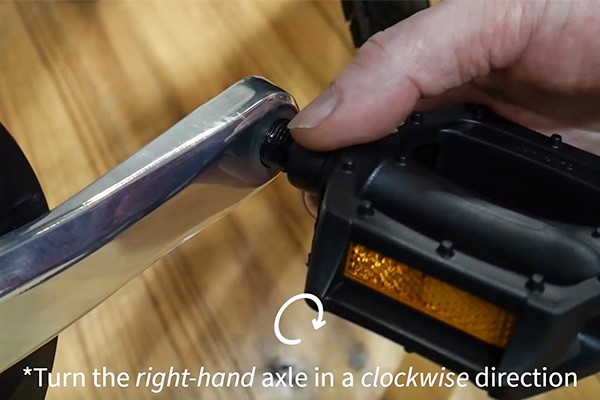
Turn the pedal clockwise to attach the RIGHT HAND PEDAL to the bike

3
Attaching left hand pedal

As with the right hand pedal, you will need to screw the left pedal in by the axle and it is worth adding a touch of grease onto the threads before attaching. 

It is very important to start by screwing the Left pedal BY HAND into the crank arm in an Anti-clockwise direction (opposite to normal threading), or towards the front of the bike. It should go in easily. When it gets to the end, use the spanner or Allen key to tighten it fully. Use only a small amount of force to tighten.
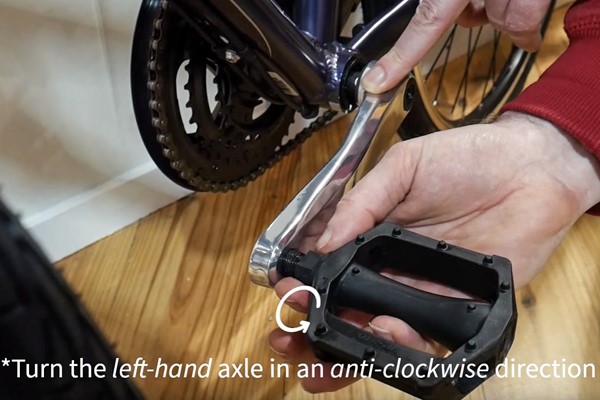
Turn the LEFT HAND PEDAL anticlockwise to install

4
Removing pedals

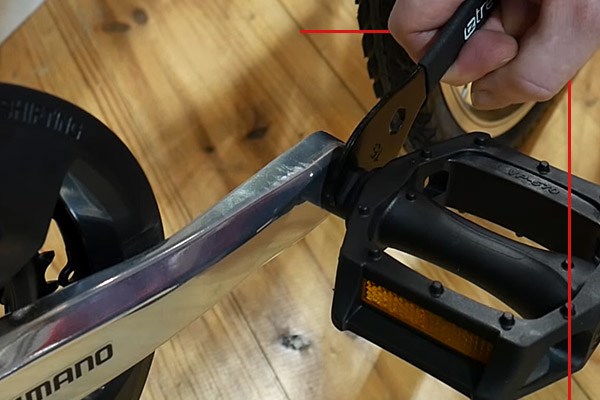
You may need to remove the pedals at some point. It is as simple as attaching them. Using a pedal spanner or Allen key, loosen the pedals by turning towards the rear of the bike or an Anti-clockwise position for the Right and a Clockwise position for the Left.
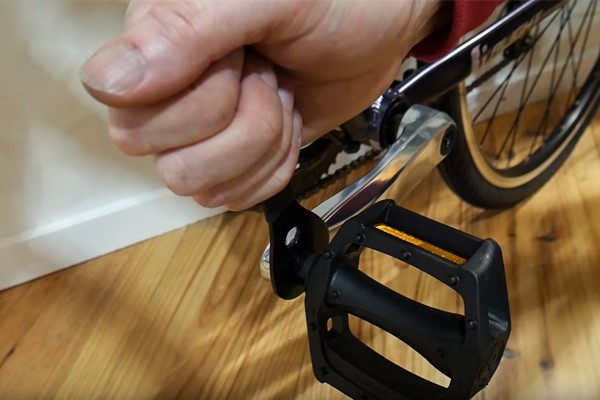
Remove the pedal carefully with a spanner or Allen key, TWIST THE TOOL TOWARDS THE REAR WHEEL OF THE BIKE

Recommended Products


Suggested Guides


£5 OFF VOUCHER

When you spend £50 or more.

Sign up to our newsletter and get all the deals and special offers first.

GoogleNorton securedNovunaPayPal Credit

© Performance Cycling Limited 2024. Tredz is a trading name of Performance Cycling Limited. All Rights Reserved Company No. 03398601 | VAT No: 797 0776 69

† IMPORTANT INFORMATION: Performance Cycling Limited FRN: 720557 trading as Tredz & Tredz Bikes are Authorised and Regulated by the Financial Conduct Authority. We are a credit broker, not a lender – credit is subject to status and affordability, and is provided by a panel of lenders of whom we have a commercial relationship. Terms & Conditions Apply. Performance Cycling Limited trading as Tredz is registered in England and Wales 03398601. Registered office: Icknield Street Drive, Washford West, Redditch, Worcestershire, England, B98 0DE. Performance Cycling Limited trading as Tredz is authorised and regulated by the Financial Conduct Authority. Our registration number is 720557. Credit provided subject to age and status.

Finance is subject to application, financial circumstances and borrowing history. Performance Cycling Limited FRN: 720557 trading as Tredz are authorised and regulated by the Financial Conduct Authority. We are a credit broker not a lender – credit is subject to status and affordability and is provided by Mitsubishi HC Capital UK PLC. Terms & Conditions Apply.

† Novuna Representative Example: If total purchase price is £4,255.52 and your selected term is 36 months 14.9% APR Representative, Annual Interest Rate 14.9% p.a. Fixed with £0 deposit you would pay £145.38 per month. Total amount payable will be £5.233.68 with a cost of credit of £978.16.

† Novuna Buy Now Pay Later Example: If total purchase price is £4,255.52, payment holiday of 12 months and 24 monthly payments at 9.9% APR Representative, Annual Interest Rate 9.9% p.a. Fixed with £0 deposit you would pay £213.02 per month. Amount of Credit £4255.52, Total amount payable will be £5,112.48 with a cost of credit of £856.96. If the loan amount is voluntarily paid in full before the deferral period ends, interest will be waived but an early settlement fee up to £29 will apply.

PayPal Credit is subject to status. Terms and Conditions apply. Performance Cycling Limited acts as a broker and offers credit from PayPal Credit. PayPal Credit is a trading name of PayPal UK Ltd Registered Office: Whittaker House, Whittaker Avenue, Richmond-Upon-Thames, Surrey, United Kingdom, TW9 1EH. † Full Representative Example: Representative 23.9% APR (variable), Purchase interest rate 23.9% p.a. (variable), Assumed credit limit £1,200.00.

PayPal Credit and PayPal Pay in 3 are trading names of PayPal UK Ltd Registered Office: Whittaker House, Whittaker Avenue, Richmond-Upon-Thames, Surrey, United Kingdom, TW9 1EH. PayPal Credit: Terms and conditions apply. Credit subject to status, UK residents only, Performance Cycling Limited acts as a broker and offers finance from a restricted range of finance providers. PayPal Pay in 3: PayPal Pay in 3 is not regulated by the Financial Conduct Authority. Pay in 3 eligibility is subject to status and approval. 18+. UK residents only. Pay in 3 is a form of credit, may not be suitable for everyone. Use may affect your credit score or make credit less accessible or more expensive for you. Consider if affordable for you. See product terms for more details.

Learn more about Pay in 3.

FacebookXInstagramYouTubeStrava